Of Gaskets, Carpets, and Curves
Plotting Sierpinski fractals using Turtle graphics in Python.
I’m absolutely convinced that sometimes less is more. I discovered that Python’s Turtle library, as basic as it is, can be used to plot simple fractals. In this post, I share three simple python programs which I wrote to plot three very well known, eponymous fractals discovered by the Polish mathematician Wacław Sierpiński. It can take 10 or more seconds to produce the images due to the slow nature of Turtle and the order/level value chosen for the fractals, but it can be instructive, if not somewhat entertaining, to watch the construction process of the fractal figures.
Sierpinski Gasket
A Sierpinski gasket (or triangle) can be produced by dividing an equilateral triangle into 4 smaller equilateral triangles, and then removing the middle triangle. Repeating this process on the remaining smaller equilateral triangles for an indefinite number of steps will produce the fractal. In practice, this repetition isn’t done indefinitely and is halted after a predetermined number of repetitions.
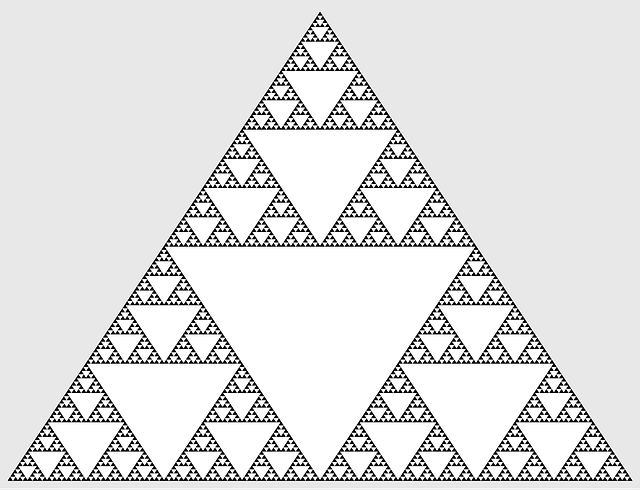 Sierpinski gasket - (stock image not produced by sample code)
The image shown below is a Sierpinski gasket with inverted coloration of the triangles. This image was created using the included sample code with the variable tlevel set to 5.
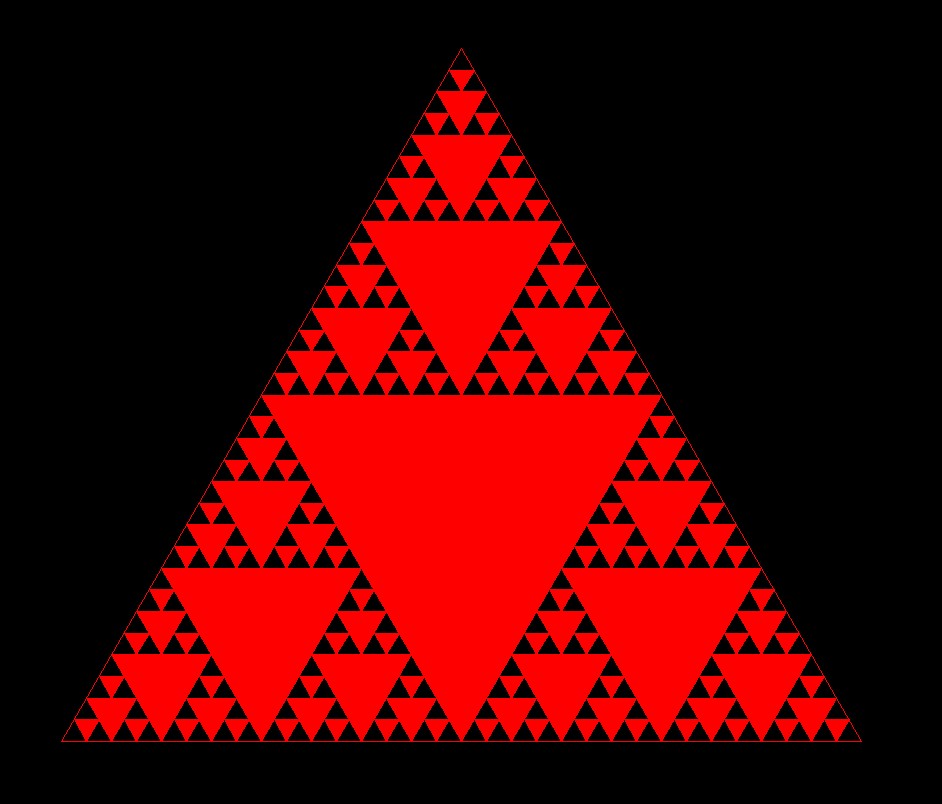 Inverted Sierpinski gasket for (level = 5)
1
2
3
4
5
6
7
8
9
10
11
12
13
14
15
16
17
18
19
20
21
22
23
24
25
26
27
28
29
30
31
32
33
34
35
36
37
38
39
40
41
42
43
44
45
46
47
48
49
50
51
52
53
54
55
56
57
58
59
60
61
62
63
64
65
66
67
68
69
70
71
72
73
74
75
76
77
78
79
80
81
82
83
84
85
86
87
88
89
90
91
92
93
94
95
96
97
98
99
# draws a sierpinski gasket

import turtle
import math

def draw_eqilateral_triangle(tr_pos_x, tr_pos_y, tr_size, tr_color):
    t1 = turtle.Turtle()
    drw_angle = 120

    t1.color(tr_color)
    t1.penup()
    t1.setpos(tr_pos_x,tr_pos_y)
    t1.pendown()
    t1.hideturtle()

    t1.forward(tr_size)
    t1.left(drw_angle)
    t1.forward(tr_size)
    t1.left(drw_angle)
    t1.forward(tr_size)

# draws inverted triangle (tr_pos_x, tr_pos_y) = location of the vertex
def draw_dividing_triangle(tr_pos_x, tr_pos_y, tr_size, tr_color):
    t1 = turtle.Turtle()
    drw_angle = 120

    t1.color(tr_color)
    t1.penup()
    t1.setpos(tr_pos_x,tr_pos_y)
    t1.pendown()
    t1.hideturtle()

    t1.begin_fill()
    t1.left(drw_angle)
    t1.forward(tr_size)
    t1.right(drw_angle)
    t1.forward(tr_size)
    t1.right(drw_angle)
    t1.forward(tr_size)
    t1.end_fill()

# draws the three smaller triangles which surround the "mother" triangle
def draw_subordinate_triangles(tr_pos_x, tr_pos_y, tr_size, tr_color, nlevel):
    ang_radians = math.radians(30)
    new_size = 0.5 * tr_size

    # draw top triangle
    x_pos1 = tr_pos_x
    y_pos1 = (tr_size * math.cos(ang_radians)) + tr_pos_y
    draw_dividing_triangle(x_pos1, y_pos1, new_size, tr_color)

    # draw bottom left triangle
    x_pos2 = tr_pos_x - new_size
    y_pos2 = tr_pos_y
    draw_dividing_triangle(x_pos2, y_pos2, new_size, tr_color)

    # draw bottom right triangle
    x_pos3 = tr_pos_x + new_size
    y_pos3 = tr_pos_y
    draw_dividing_triangle(x_pos3, y_pos3, new_size, tr_color)

    # recurse for specified number of levels
    if nlevel > 1:
        draw_subordinate_triangles(x_pos1, y_pos1, new_size, tr_color, nlevel - 1)
        draw_subordinate_triangles(x_pos2, y_pos2, new_size, tr_color, nlevel - 1)
        draw_subordinate_triangles(x_pos3, y_pos3, new_size, tr_color, nlevel - 1)

def draw_sierpinski_triangle(startx, starty, tr_pos_x, tr_pos_y, tr_size, tr_color, nlevel):
    if nlevel < 0:
        return
    else:
        draw_eqilateral_triangle(startx, starty, tr_size, tr_color)

        if nlevel == 0:
            return
        if nlevel == 1:
            draw_dividing_triangle(tr_pos_x, tr_pos_y, tr_size / 2, tr_color)
            return
        elif nlevel > 1:
            draw_dividing_triangle(tr_pos_x, tr_pos_y, tr_size / 2, tr_color)
            draw_subordinate_triangles(tr_pos_x, tr_pos_y, tr_size / 2, tr_color, nlevel - 1)

screen = turtle.Screen()
screen.setup(1600, 1000)
screen.bgcolor(0,0,0)
screen.delay(0)

# change these parameters for different results
startx = -400
starty = -400
tsize = 800
tx = startx + (tsize / 2)
ty = starty
tcolor = "red"
tlevel = 3

draw_sierpinski_triangle(startx, starty, tx, ty, tsize, tcolor, tlevel)

screen.mainloop()
Sierpinski Arrowhead Curve
The Sierpinski curve very closely resembles the Sierpinski gasket, and can be produced by recursing on a given set of simple production rules:
- draw a line
- then turn left or right 60°
The curve below was produced by a very straightforward translation of some C++ code into Python. Rendering the curve takes between 15 to 40 seconds, but it’s fun to watch the turtle cursor trace out its path.
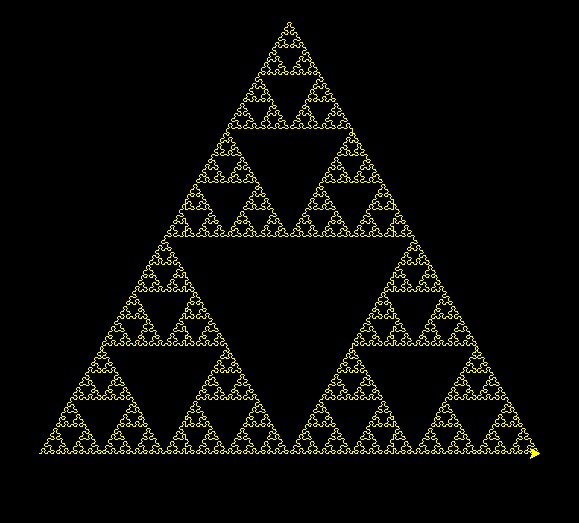 Sierpinski arrowhead curve for order=8
1
2
3
4
5
6
7
8
9
10
11
12
13
14
15
16
17
18
19
20
21
22
23
24
25
26
27
28
29
30
31
32
33
34
35
36
37
38
39
40
41
42
43
44
45
46
47
# draws Sierpinski arrowhead curve
# credit for C++ code: https://en.wikipedia.org/wiki/Sierpi%C5%84ski_curve

import turtle
import random

def draw_curve(order, length, angle, tr_turtle):
    if order == 0:
        tr_turtle.forward(length)
    else:
        draw_curve(order - 1, length / 2, -angle, tr_turtle)
        tr_turtle.rt(angle)
        draw_curve(order - 1, length / 2, angle, tr_turtle)
        tr_turtle.rt(angle)
        draw_curve(order - 1, length / 2, -angle, tr_turtle)


def sierpinski_arrowhead_curve(startx, starty, order, length, tcolor):
    t1 = turtle.Turtle()
    t1.color(tcolor)
    angle = 60

    t1.penup()
    t1.setpos(startx, starty)
    t1.pendown()

    if order % 2 == 0:
        draw_curve(order, length, angle, t1)
    else:
        t1.rt(angle)
        draw_curve(order, length, angle, t1)

screen = turtle.Screen()
screen.setup(600, 600)
screen.bgcolor("black")
screen.delay(0)

# change these parameters for different results
startx = -250
starty = 160
order = 8
length = 500
curvecolor = "yellow"

sierpinski_arrowhead_curve(startx,-starty, order, length, curvecolor)

screen.mainloop()
Sierpinski Carpet
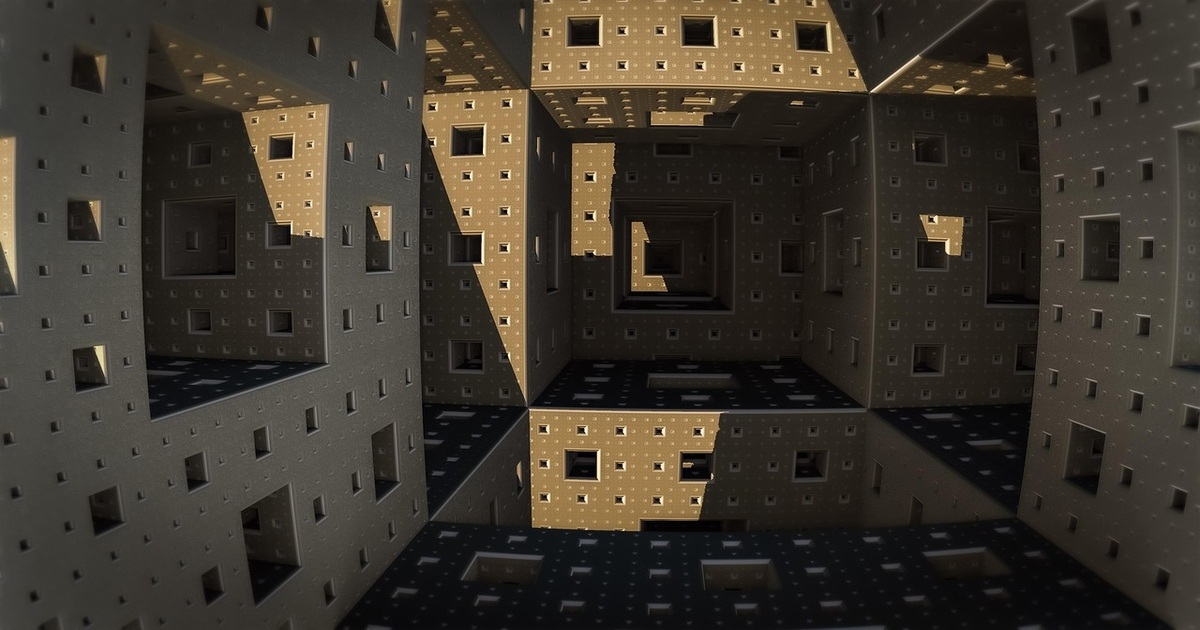
The Sierpinski carpet can be constructed using a method similar to the one introduced earlier for the Sierpinski gasket. A square is divided into 9 squares of equal size and the middle square removed. This process is then repeated for the remaining squares indefinitely. In practice, as with the gasket, the number of repetitions is usually specified by a preset value.
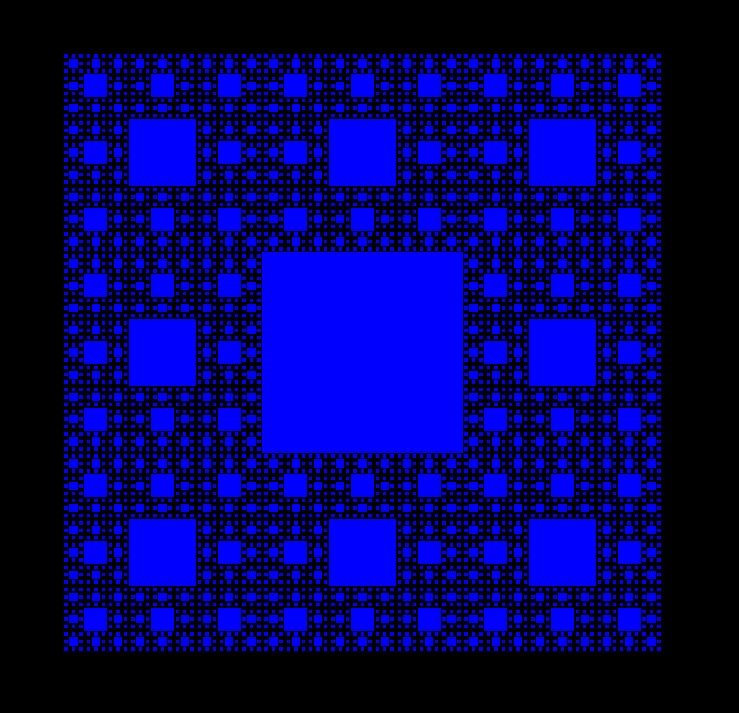
 Sierpinski carpet - (stock image not produced by sample code)
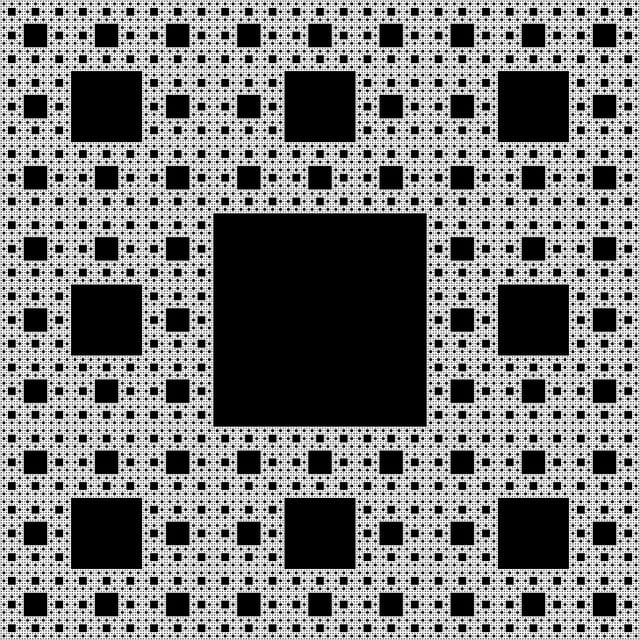
When using the included sample code, setting the level value to 5 results in a very nice carpet with inverted coloration as shown below. This image took more than 10 minutes to render using Turtle. (Yes, Turtle can be frightfully slow.)
 Inverted Sierpinski carpet for level=5
1
2
3
4
5
6
7
8
9
10
11
12
13
14
15
16
17
18
19
20
21
22
23
24
25
26
27
28
29
30
31
32
33
34
35
36
37
38
39
40
41
42
43
44
45
46
47
48
49
50
51
52
53
54
55
56
57
58
59
60
61
62
63
64
65
66
67
68
69
70
71
72
73
74
75
76
77
78
79
80
81
82
83
84
85
86
87
88
89
90
91
92
93
94
95
96
97
98
99
# draws a Sierpinski carpet

import turtle

def draw_square(sqx_pos, sqy_pos, sq_length, sq_color, fill_status):
    #setup turtle
    tsq = turtle.Turtle()
    tsq.color(sq_color)
    tsq.penup()
    tsq.setpos(sqx_pos, sqy_pos)
    tsq.pendown()
    tsq.speed(0)
    tsq.hideturtle()

    if fill_status == True:
        tsq.begin_fill()

    #draw square
    for index in range(4):
        tsq.forward(sq_length)
        tsq.right(90)

    if fill_status == True:
        tsq.end_fill()

def draw_subordinate_squares(sqx_pos, sqy_pos, sq_length, sq_color, fill_status, nlevel):
    new_size = (1/3) * sq_length
    pos_x = [0, 0, 0, 0, 0, 0, 0, 0]
    pos_y = [0, 0, 0, 0, 0, 0, 0, 0]

    # draw top left square
    pos_x[0] = sqx_pos - (2/3) * sq_length
    pos_y[0] = sqy_pos + (2/3) * sq_length
    draw_square(pos_x[0], pos_y[0], new_size, sq_color, fill_status)

    # draw the middle left square
    pos_x[1] = sqx_pos - (2/3) * sq_length
    pos_y[1] = sqy_pos - (1/3) * sq_length
    draw_square(pos_x[1], pos_y[1], new_size, sq_color, fill_status)

    # draw the bottom left square
    pos_x[2] = sqx_pos - (2/3) * sq_length
    pos_y[2] = sqy_pos - (4/3) * sq_length
    draw_square(pos_x[2], pos_y[2], new_size, sq_color, fill_status)

    # draw the top middle square
    pos_x[3] = sqx_pos + (1/3) * sq_length
    pos_y[3] = sqy_pos + (2/3) * sq_length
    draw_square(pos_x[3], pos_y[3], new_size, sq_color, fill_status)

    # draw the bottom middle square
    pos_x[4] = sqx_pos + (1/3) * sq_length
    pos_y[4] = sqy_pos - (4/3) * sq_length
    draw_square(pos_x[4], pos_y[4], new_size, sq_color, fill_status)

    # draw the top right square
    pos_x[5] = sqx_pos + (4/3) * sq_length
    pos_y[5] = sqy_pos + (2/3) * sq_length
    draw_square(pos_x[5], pos_y[5], new_size, sq_color, fill_status)

    # draw the middle right square
    pos_x[6] = sqx_pos + (4/3) * sq_length
    pos_y[6] = sqy_pos - (1/3) * sq_length
    draw_square(pos_x[6], pos_y[6], new_size, sq_color, fill_status)

    # draw the bottom right square
    pos_x[7] = sqx_pos + (4/3) * sq_length
    pos_y[7] = sqy_pos - (4/3) * sq_length
    draw_square(pos_x[7], pos_y[7], new_size, sq_color, fill_status)

    if nlevel > 1:
     for i in range(8):
      draw_subordinate_squares(pos_x[i], pos_y[i],new_size, sq_color,fill_status, nlevel - 1)

def draw_sierpinski_carpet(qx_pos, qy_pos, sq_length, sq_color, fill_status, nlevel):
   if nlevel <= 0:
      return
   elif nlevel == 1:
      draw_square(qx_pos, qy_pos, sq_length, sq_color, fill_status)
      return
   elif nlevel > 1:
      draw_square(qx_pos, qy_pos, sq_length, sq_color, fill_status)
      draw_subordinate_squares(qx_pos, qy_pos, sq_length, sq_color, fill_status, nlevel - 1)

screen = turtle.Screen()
screen.setup(800, 800)
screen.bgcolor(0, 0, 0)
screen.delay(0)

# change these parameters for different results
sq_color = "blue"
sq_size = 200
sq_x = -100
sq_y = 100
level = 3

draw_sierpinski_carpet(sq_x, sq_y, sq_size, sq_color, True, level)

screen.mainloop()
Updates and Improvements
Since I first published this post, I discovered that rendering images using Turtle could be significantly sped up by turning off screen updating. This can be done using the function call turtle.tracer(0), and then calling turtle.update() after to see the plotted fractal. I added this to the code and saw a significant improvement in the time taken to plot the fractals for higher values of n(= level). Turning off the cursor also helps with reducing plot time, but it doesn’t have the same impact as completely turning off screen updating.
I created a Github repo called TurtleFractals where the updated code for these sample programs can be found.
   |